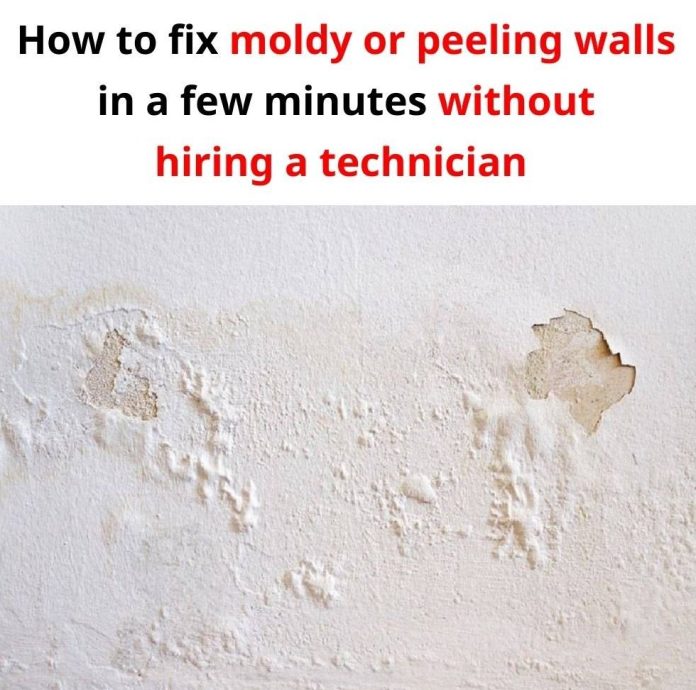
Over time, your home’s walls can develop unsightly problems such as mold, blistering, or peeling. These issues are particularly common during the rainy season when humidity levels are high, exacerbating moisture-related problems. While hiring professionals is a common solution, many of these issues can be resolved with a little effort, the right tools, and proper techniques. By addressing these problems yourself, you can save money and keep your walls looking fresh and clean.
Below are step-by-step instructions for tackling the most common wall issues.
1. Mold Treatment
Mold is a persistent issue, especially in damp and humid environments. Not only does it make walls look dirty, but it can also pose health risks, such as triggering allergies or respiratory issues. Follow these steps to effectively eliminate mold:

- Step 1: Remove Visible Mold
Start by gently scrubbing visible mold spots with a dry toothbrush to loosen and remove surface mold. Next, use a soft cloth soaked in alcohol to wipe the affected area. This helps dry out the mold and prevents further growth. - Step 2: Use a Bleach Solution
Prepare a mixture of bleach and water in a 1:99 ratio (1 part bleach to 99 parts water). Pour this solution into a spray bottle and spray it on the moldy areas. For stubborn mold during humid weather, increase the bleach concentration to a 1:20 ratio for more effective results. Let the solution sit for several minutes before wiping it away with a clean cloth. - Step 3: Smooth and Repaint
Once the wall is completely dry, use sandpaper to smooth the surface. Apply a layer of waterproof primer to protect against future mold growth caused by moisture. Finish by repainting the wall with a high-quality, mold-resistant paint.
2. Fixing Blistering Walls
Blistered walls are a common problem that often results from moisture trapped beneath the paint layer or poor wall preparation. This creates unsightly bubbles that can ruin the appearance of your walls. Here’s how to fix them:
- Step 1: Remove Damaged Paint
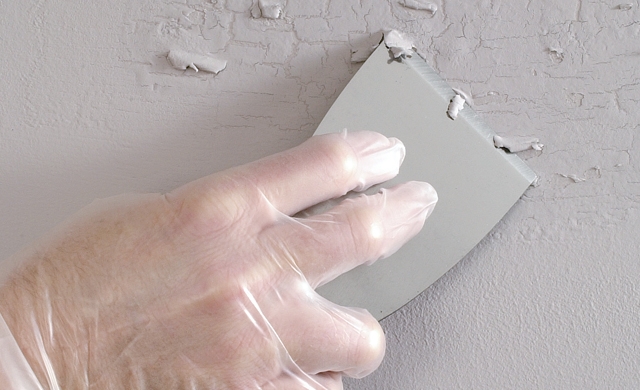
Scrape off any blistered or peeling paint with a scraper. If the underlying problem is due to poor-quality wall filler, remove it and replace it with a high-quality filler that adheres better to the surface. - Step 2: Treat Small Blisters
For small, localized blisters, scrape off the affected area, smooth the edges, and apply a layer of primer. Repaint the area with matching paint for a seamless finish. - Step 3: Repair Large Blisters
For extensive blistering, remove the entire damaged section. Allow the wall to dry completely to ensure no moisture remains trapped. Reapply plaster, primer, and paint for a durable fix. - Step 4: Prevent Future Blistering
Proper waterproofing is crucial to preventing blistering. Repair any cracks in the wall before painting, avoid painting during the rainy season, and use primer and paint products from the same brand to ensure compatibility.
3. Addressing Peeling Walls
Peeling walls not only look unattractive but can also create dust, affect sanitation, and weaken the wall structure over time. Here’s how to address peeling effectively:
- Step 1: Scrape and Prepare
Scrape off the peeling paint and remove old filler. Smooth the edges of the damaged area with sandpaper. Apply a primer to create a stable base before repainting. - Step 2: Treat Severe Peeling
For areas with severe peeling, remove the damaged wall layer entirely. Treat the exposed surface with a waterproof primer to seal it against future moisture-related issues. Repaint using high-quality paint. - Step 3: Tackle Heavily Peeling Sections
Dampen heavily peeling areas with water to soften the paint, making it easier to scrape off. If the original filler remains intact and no dust falls during scraping, the base quality is good. Smooth the surface with sandpaper, then apply primer and fresh paint.
Additional Tips for Wall Maintenance
- Regular Inspection: Check your walls periodically for early signs of mold, blistering, or peeling, especially during rainy or humid seasons.
- Ventilation: Ensure proper ventilation in your home to reduce humidity levels and prevent moisture buildup.
- Choose Quality Materials: Invest in high-quality fillers, primers, and paints to extend the lifespan of your walls.
- Avoid Overpainting: Applying too many layers of paint can trap moisture and cause blistering. Remove old paint layers as needed before repainting.
Conclusion
With the right techniques and materials, you can address common wall problems like mold, blistering, and peeling without professional help. By following these simple steps, you’ll not only save money but also ensure your walls remain clean, fresh, and protected from future damage. Regular maintenance and preventive measures can keep your home looking its best and safeguard your family’s health. So, take charge of your walls and restore their beauty with these DIY solutions!

